I was playing around with my recently acquired Pixel x86 mini computer. This machine allows to run basically a hard drive from an SD Card.
For nostalgic reasons I also wanted to run a localized version of Windows 98 Second Edition (in my case Dutch). As this computer has built-in USB 1.1 and 2.0, there is a need for better drivers. Out of the box Windows 98 SE only has USB 1.1 support and lacks proper devices drivers for various USB devices. The unofficial nUSB36 package solves this by providing improved 1.1 support and 2.0 support. However it has one disadvantage and that is that it is not working well in localized versions of Windows as it is based on the English version. It overwrites various Windows core components, causing for example the start menu to revert to English which is unfortunate when running a localized version. In this article I will describe how you can modify the driver package and make it a localized version with similar functionality.
Note: Windows 98 First Edition is not supported as this lacks USB support for WDM (Windows Driver Model), which is required to install these drivers.
Prerequisites
First make sure to download both the original nUSB36e package and the Q242975 update (the latest update package that Microsoft launched for Win 98SE with patches to the standard USB drivers/utilities). The package for the update contains all available localized variants.
The update package is hosted here, as it is almost nowhere hosted nowadays as the interest in these kind of packages is very limited, so I bundled all languages I could find online.
Preparing driver package
First extract the nUSB36e.exe file using a tool like 7-zip to a new folder. The folder should have similar contents like shown below (Note: make it easier for you in Windows to work with these files by making sure hidden and system files are shown and file extensions are enabled):
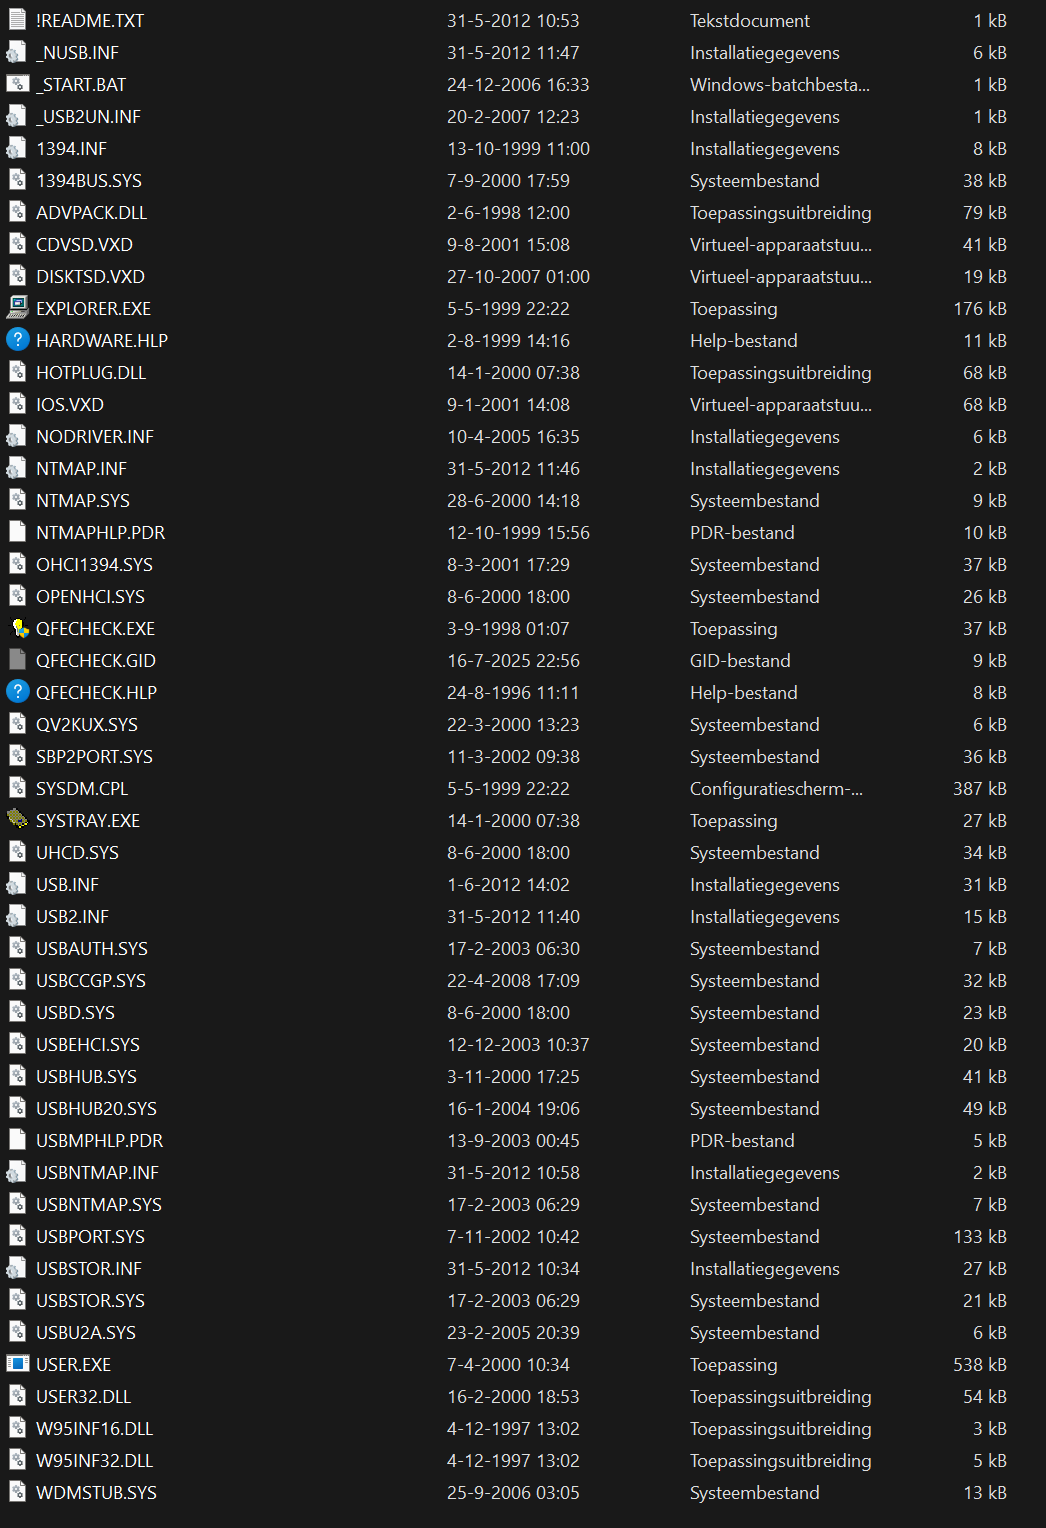
The folder contains a few system files which are overwriting the default Windows system files by English versions.
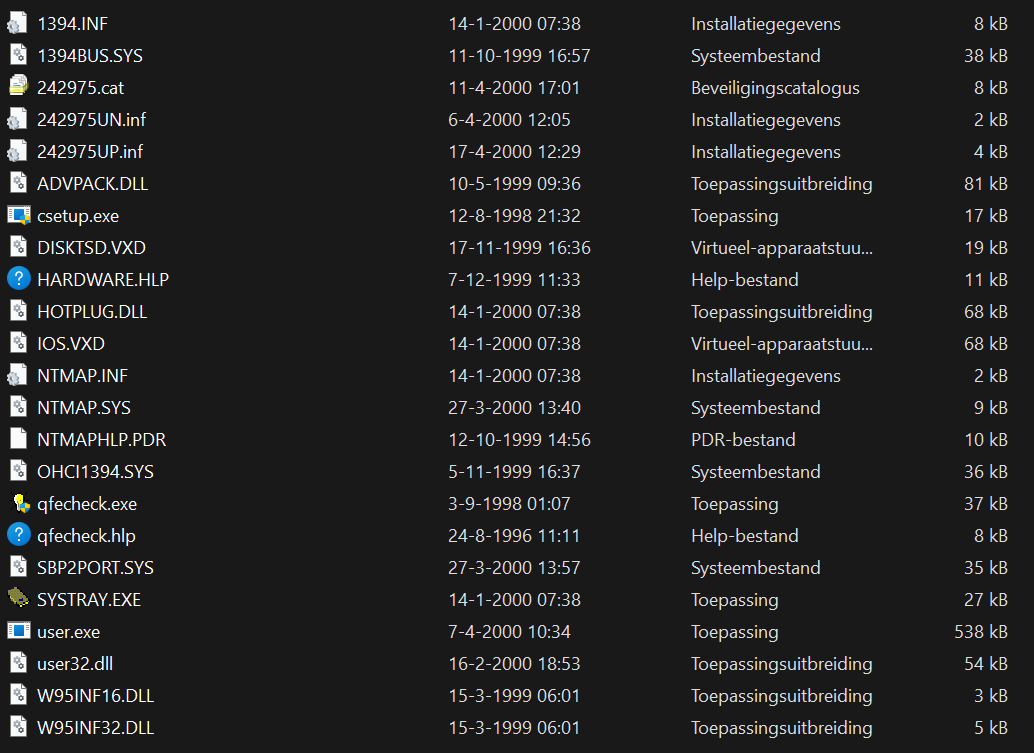
Next extract the Q242975 update package. Then determine which exe file you need to extract. The format is 242975<threeletterlanguagecode>8.exe. So for example for the language Dutch, the abbreviation is dut, so the file you need to use is 242975dut8.exe. Extract this file also with a tool like 7-Zip to a new folder. The folder contents should look like this:
Now make sure to copy the following files from the extracted folder to the earlier extracted nUSB36e package:
- user.exe
- user32.exe
- qfecheck.exe
- qfecheck.hlp
- hardware.hlp
- systray.exe
- hotplug.dll
Next you need to open up a copy of the Windows 98 SE CD-ROM (nowadays you can find ISO’s on WinWorld) and open using a tool like 7-ZIP the WIN98/WIN98_25.CAB file. Copy the sysdm.cpl file and overwrite the one in the nUSB36E folder. This file is in the package overwritten, but results in that the Windows would otherwise identify itself as Windows ME in the computer properties screen.
Installation
Copy the newly created driver folder towards the target machine. This can be done in multiple ways, like SMB share, floppy drives, or by copying it directly onto for example an SD card like I use in my system.
Boot then Windows 98SE on the target system. On the target system open up the folder in Explorer with the prepped package:

Doubleclick on the _start.bat file. This file will automatically install the whole package and will request to reboot the machine. Then reboot the machine to finish installing the new driver library.
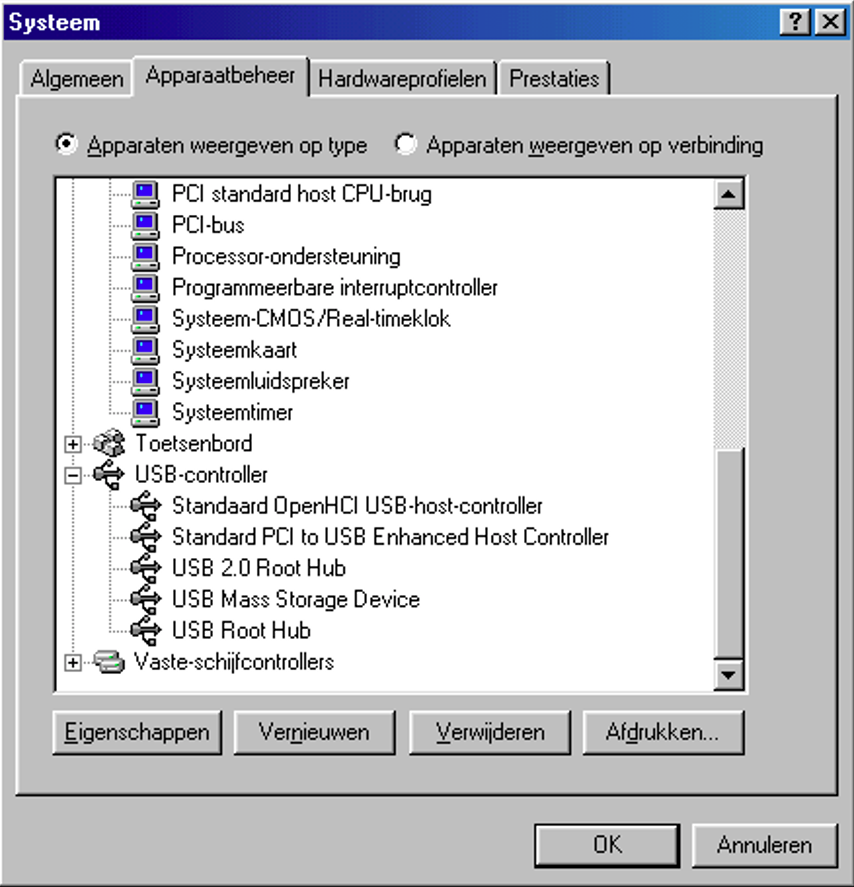
After reboot open the device manager. Probably the USB hubs are not recognized immediately. Right click on the not recognized device and choose Properties. Then go to the Device Driver Tab and choose to update the device driver. In the wizard select to search for a better device driver and then untick all options. Then the Windows Device Driver library gets rebuild with the newly copied inf files. Then it will propose to install the USB drivers. It can be that this needs to be repeated a couple of times as then also for example of external thumb drives or CD-ROM players the Mass Storage Device Driver must be installed as well. After completion the device manager will look something like this:
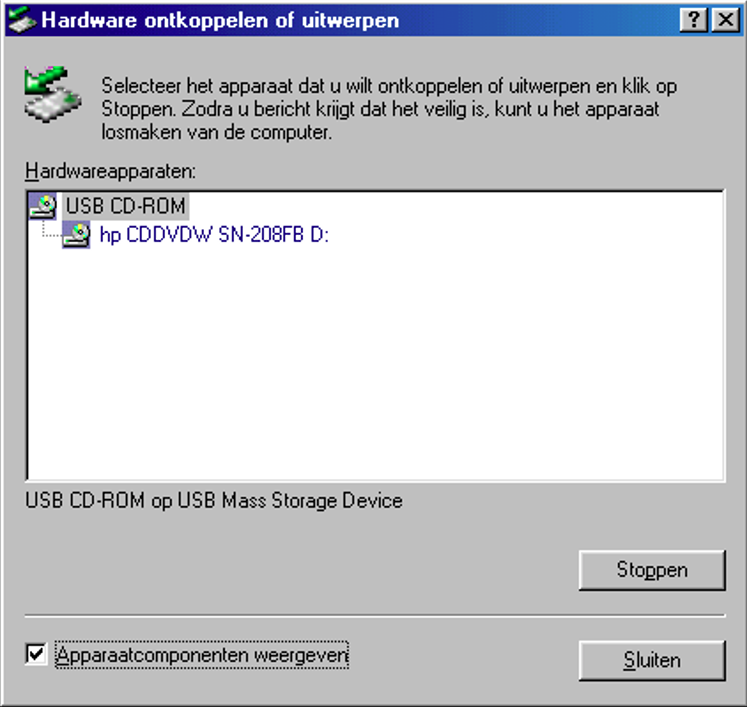
Also in case a device is plugged in you will notice in the taskbar tray the Eject icon. When clicking on it it should show a localized version of the Hotplug menu:
After this the installation is fully complete. Don’t expect a fast USB transfer rate like on modern Windows devices or even older computers but with running Windows XP which has far better USB support and support native USB 2.0.