Time for a new post about a completely different subject. Last year we bought a new house, so it was time to start with some more serious smart home setup. I decided to go for Home Assistant, installed on a Raspberry Pi 4B paired with an SSD for reliability (as SD cards go bad over time when a lot of data is being written).
We installed electrical roller blinds at various windows to prevent heat coming inside during summer and wanted a way to control those as well with Home Assistant. The roller blinds are equipped with Somfy RTS motors, which can be controlled using a remote. The RTS motors have as advantage that they can be controlled more easily with external hardware, but the downside is that it only supports communication in one-direction. It is not communicating back state of various components. This means that when you open a shutter, the system never knows if it actually opened and also how far. Somfy io (also called io-homecontrol) does support this, but is a proprietairy protocol and requires specific hardware (like a TaHoma switch) which also needs to be connected to the cloud in order to use it and is just another brick in your house which needs to be powered 24/7. Note: Make sure to check which motor type you have or check it before you buy it!
To integrate Somfy RTS into Home Assistant, I decided to buy a specific piece of hardware to allow to send out RF signals to the Somfy RTS motors around the house. I bought the RFXtrx433XL, which you can connect using USB to a Raspberry Pi or other device to send out RF signals (on 433MHz) to various devices. However I struggled with configuring the Somfy RTS motors the first time and couldn’t find an easy guide so that’s the reason why I describe here the steps how to configure RFXCom properly together with Somfy RTS. Later I also explain how to configure the devices then in Home Assistant so that you can use them within Dashboards, Automations, etc.
Programming RFXtrx with Somfy RTS
First step is download RFXmngr. Check the link to find the latest available version and install it. Then connect the RFXtrx to your computer and open up RFXmngr.
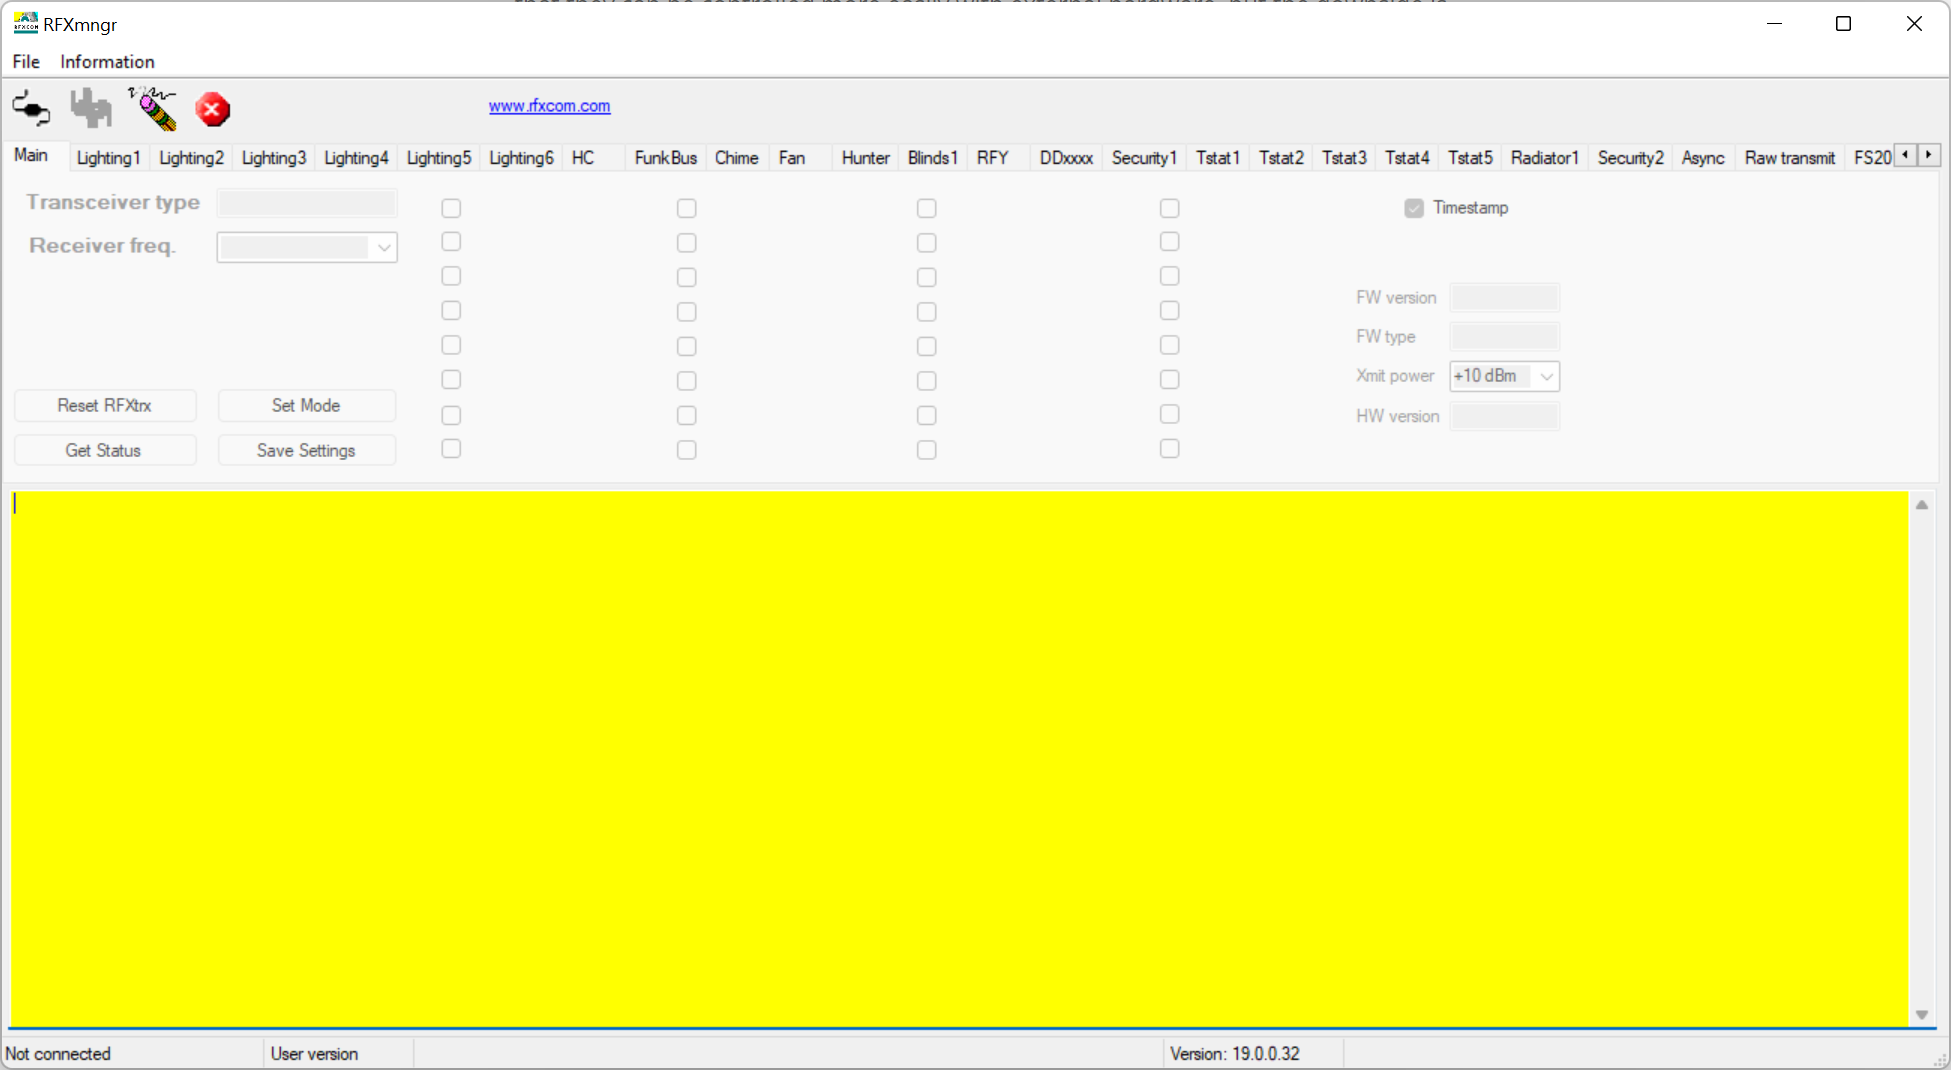
You will see a screen like above and need to click on File -> Connect. When you’ve connected an RFXtrx usually the com port is automatically selected:
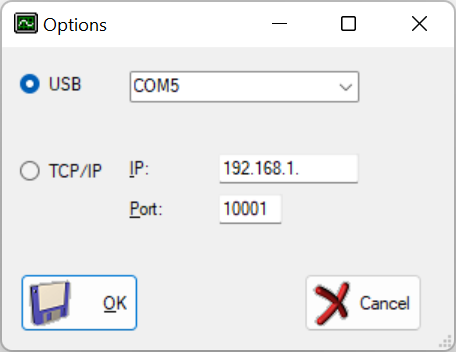
Note: There are also RFXtrx versions available with network capabilities and are not directly connected to a computer. In that case it should be possible to use TCP/IP and by using the right IP and Port number to connect over ethernet.
Then navigate to the RFY tab:
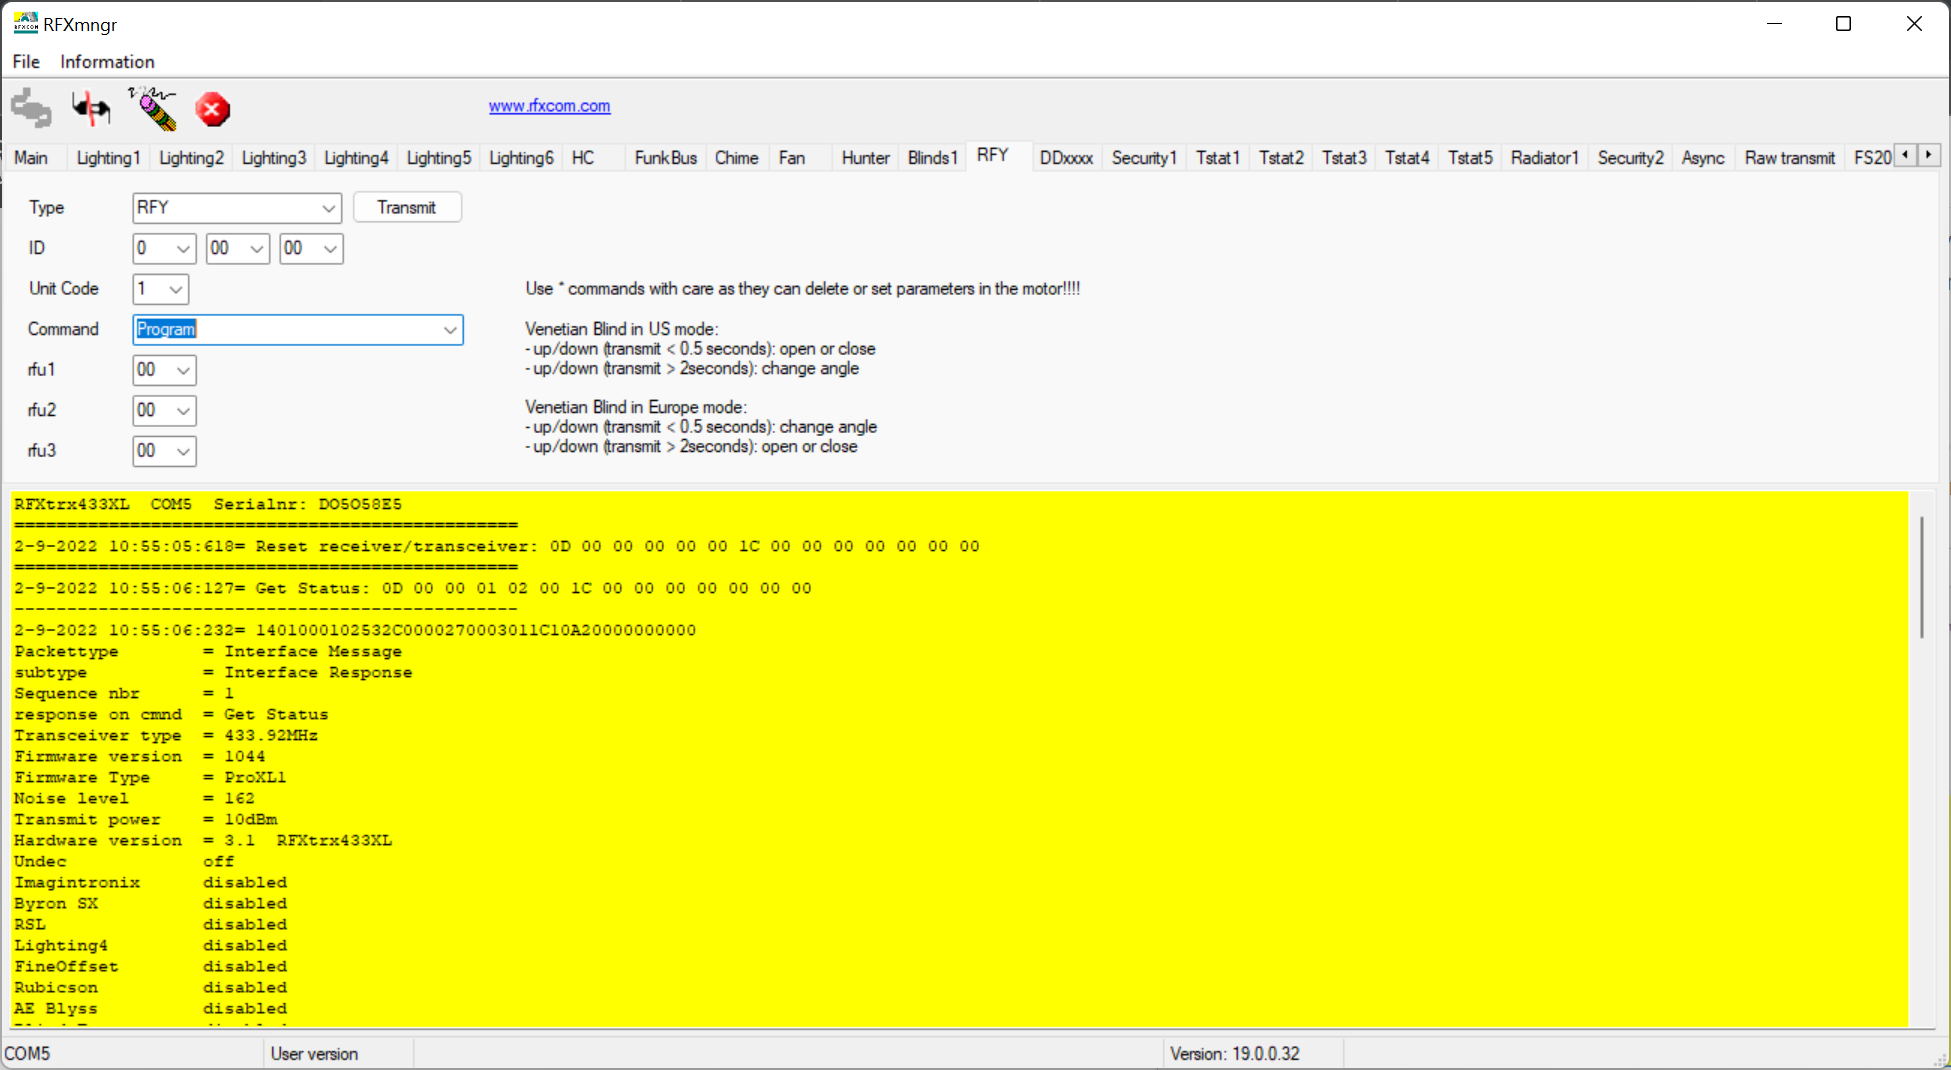
Here a few things are important:
- ID
This indicates the unique id - Unit Code
Each unique id supports up to 5 devices, which are called units - Command
This is needed to send a specific command to the device. In this case we must set it to program as we’re going to program some shutters to control them with RFXtrx.
My suggestion is to create some spreadsheet to keep track of all devices and unique id’s. I started with ID 00 00 00 and Unit Code 0. Then for the second device I increased the Unit Code. And then after Unit Code 4, I increased ID to 00 00 01 and start again with Unit Code 0 and so on. This way it is easier later to program all the devices in Home Assistant with the right code. Also already prefix the Unit Code with a 0 in your spreadsheet as you need this later on in this format for adding devices in Home Assistant.
Next step is to actually set the devices in programming mode to program the RFXtrx. To do this you need a few items:
- Remotes of all devices you want to program
- A pen or small screwdriver to put the remote in programming mode
First in RFXmngr set the ID and Unit Code to the desired configuration. Then make sure to set Command to Program. Then walk to the device which you want to program with the remote. On the back of the remote is a hole and with a pen or screwdriver you need to short circuit this to set it to program mode. The device should respond with opening and closing shortly to indicate that it is set to program mode. Sometimes it is a bit fiddly and you need a few tries to get this done. When the device indicated it is in programming mode, click on the Transmit button in RFXmngr. Then the device should again quickly open and close. That is an indicator it has been programmed. Make sure to write down in your spreadsheet which device it is, such that you later can rename the device in Home Assistant again. Now you can also test easily the device. If you for example change the Command to Down and then click on Transmit again, the device should move to the down position. Repeat this process until all devices have been programmed, and make sure that each device has a unique combination of ID and Unit Code! When finished it is time to close RFXmngr and disconnect the RFXtrx from the computer.
Configure RFXCOM in Home Assistant
Connect the programmed RFXtrx to your device running Home Assistant. Next step is to open Home Assistant and go to Settings -> Integrations. Then click on add Integration and search for rfxcom:
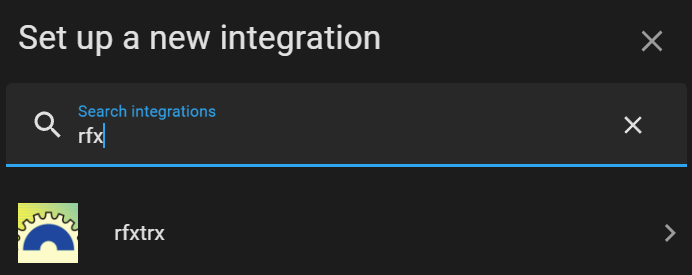
Add the integration and also check to box to automatically add new devices. For some reason in my case this not always work, so you might need to add the devices manually to Home Assistant. I will describe here how to add the earlier programmed devices manually.
As this guide describes, there is a fixed way how devices codes are working within RFXCOM. All Somfy RTS devices needs to be prefixed with 071a000 followed by the ID and the Unit Code. So the code should be something like this: 071a0000[id][unit_code]
Make sure to refer to your spreadsheet and lookup each ID and Unit Code. For the Unit Code is stated that is always should be prefixed with a 0. So when the Unit Code is for example 0 (as shown in the UI of RFXmngr) then the Unit Code is 00. In our example for the first device the code should be: 071a000000000000
In Home Assistant, on the integrations screen click on the Configure link on RFXCOM. Then a window should open like below:
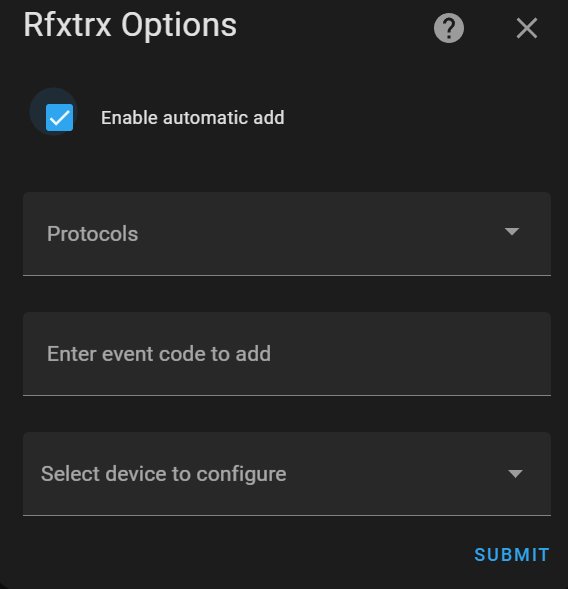
In the middle textbox, you can enter manually the event code. In this case that is the code we determined earlier. Enter it and click save. Then a new entity should have been created in Home Assistant. Make sure to rename the device to a proper name and you can also assign it to a specific room to allow later to use it in automations for a specific room, etc. Then it should look like this:
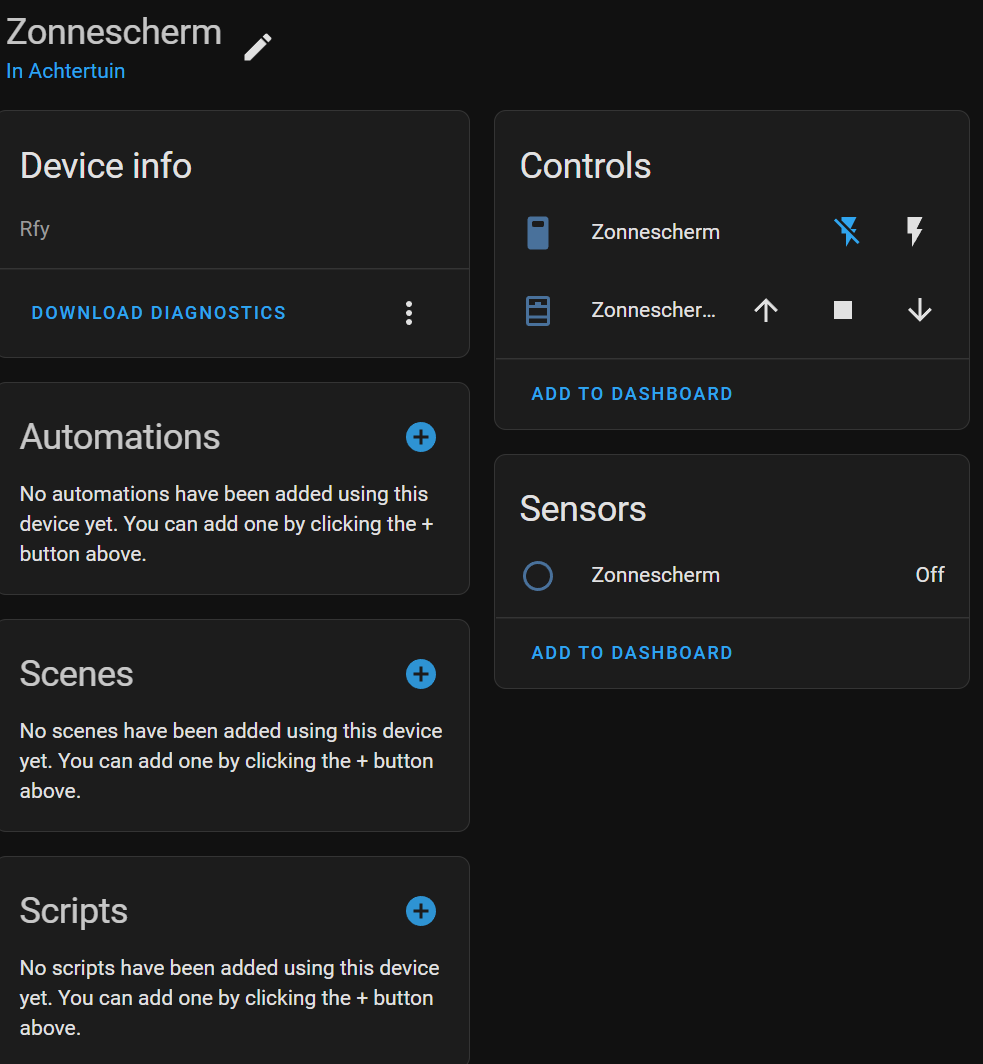
You can now also test the device directly by clicking the up and down icons. Then the device should go up or down if possible. When that works, you can confirm the device has been configured correctly. Repeat these steps for other devices until all programmed devices are added to Home Assistant.
After configuring, you can do whatever you want to use the entities in dashboards or use them within Automations, Scenes or Scripts like with any other integrations.