In a few series of posts I will discuss changes in SharePoint Search which might affect you when migrating from SharePoint 2010 to 2013. Search is one of the most changed components in SharePoint 2013 and therefore I split the posts up in four parts covering some subjects you need to know before migrating to SharePoint 2013. All parts will be available with the links below when the posts are available:
Part 1: Search Settings
Part 2: Search Web Parts
Part 3: Search Results Sources
Part 4: Search Result Types and Display Templates
In this post I’ll discuss Search Result Types and Display Templates. Both are new features coming with the new Search platform in SharePoint 2013. You’ll need them in case you want to customize the way how search results are displayed. In the past XSLT was the way to go by changing the search results page and change the Web Part settings XSLT. In 2013 this functionality is no longer available and Results Types and Display Templates are the way to go.
Let’s focus first on Result Types. Microsoft provides on MSDN a nice article which gives you a basic understanding of what it is. In short: when searching you’ll get results back of different types. A site is different from a library, a word document is different from an excel document or image, etc. Each type of result is defined as a Result Type. Out of the box a set of result types is predefined like all types of Office documents, pages, sites, libraries, etc. Per type a Display Template is coupled which determines how the result of the specific type should be rendered in the Search Results Web Part. Result types are managed per Site Collection and Web. In the Site Settings menu you can select Search Result Types for managing them on Site Collection level and Result Types to manage them on Web level. After opening the page you’ll see a screen with all result types on the site collection or web:
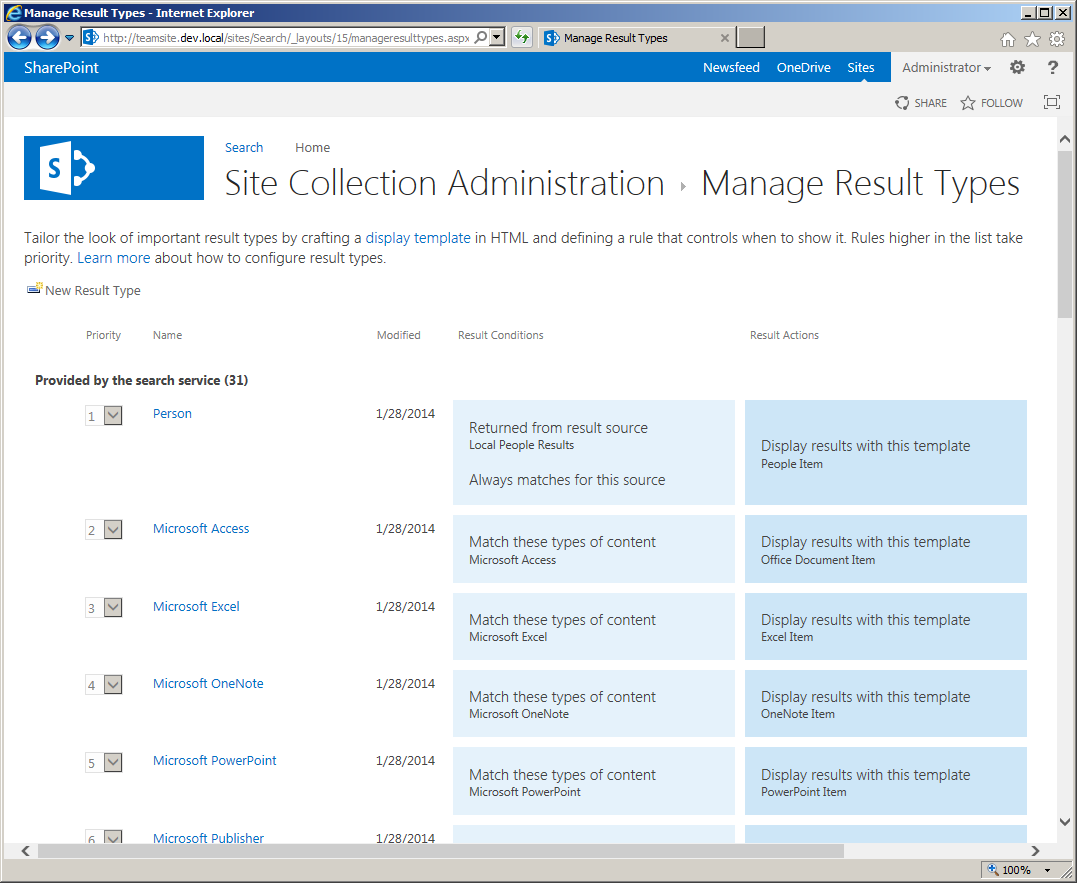
Manage Result Types page for Site Collection Administrator
All out of the box delivered Result Types are read-only. This is similar as with Result Sources, where the out of the box settings are also read-only. When we open one of the Result Types we can see how it’s configured and what you can configure:
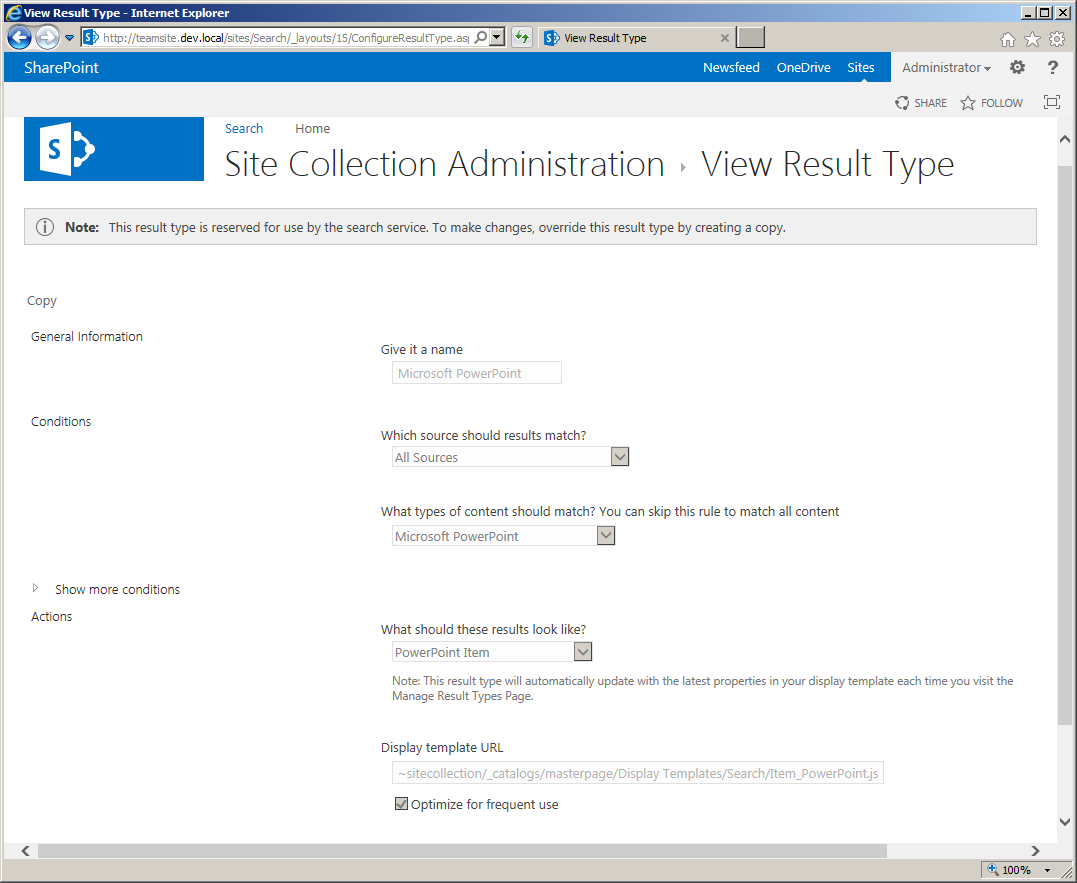
View Result Type page
For each Result Type you can specify the name and conditions. The conditions filter first on Result Sources. You can also select the option to use all if you don’t want to filter on it. Next you can filter on the type of results. This is a predefined set of types which SharePoint recognizes. When you expand “Show more conditions” you have the ability to create filters based on Managed Property values. In case you have added additional fields to specific content types and you want to filter on them you can use this functionality to add a filter. The last option you need to select a Display Template. This list is created based on the approved Display Templates in the Master Page Gallery (in the subfolder Display Templates). This is actually the template that is used to render the Search Result which is matching this Result Type. When created it will appear in the top section of available Result Types.
Now we have discussed the Result Types we can focus on Display Templates. Display Templates are the replacement for XSLT and provide a powerful way to create templates within SharePoint. Microsoft has again a good article about what a Display Template is. Display Templates are stored inside the Master Page Gallery in a subfolder called Display Templates. Inside that folder there a some subfolders for specific categories of Display Templates. In our case we need to open the Search folder and that should look like the screenshot below:

List of Search Display Templates in the Master Page Gallery.
In case the Publishing Infrastructure feature is not activated on the Site Collection, you’ll only see .js files. Be aware of this! In that case if you don’t want to activate it and want to create or change display templates, read this article from Martin Dreyer where he describes how to change display templates on non-publishing websites. On publishing websites you should ignore the .js files. They are automatically updated by SharePoint when you make changes to the HTML files. The MSDN article which I’ve shared already describes how you can change Display Templates. You can adjust them to display for example additional Managed Properties or change the styling. On the internet you can find a bunch of examples to built-in pretty cool stuff with display templates. A small selection is stated below:
– Add twitter links using Display Templates
– Image Slider
– Customize Display Templates and deploy them using a solution